Here is a little video which demonstrates how I believe Sol Hoopii played this tune, specifically on his earlier acoustic recordings in the A Major tuning.
One of the devices that Sol used most frequently is open strings–in this case, in bars 3 and 4 of the head, Sol utilizes a slide to G# on string 4, followed by open string 3 (A), for a nice bluesy lick. Have a look for yourself.
Tag: lap steel guitar
Old Steel Guitar Chord Charts (in various tunings)
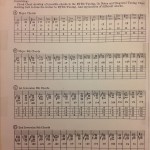
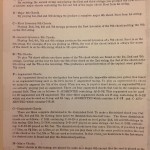
While cleaning out my studio/library, I came across these cool chord charts that were published back in the 1940s. A friend of mine had given me these photocopies years ago, and I thought I would share them with the world before they are lost forever.
These charts can be very useful for each of these tunings, which are F#9, C# Minor, E7 and B11. The charts cover chords created with a straight bar, as well as with slants and in combination with open strings. Very good tools to get you inside the tunings. Once you are in, you will discover you own chords.
The first chord folio is for F#9 tuning (used by Dick McIntire and Bernie Kaai, who lent his name and image to this booklet). F#9 tuning is essentially C# Minor tuning, but with strings 5 and 6 tuned differently (E C# G# E A# F#, from treble to bass).
(Click on each image to enlarge).
- Click to enlarge
- Click to enlarge
- Click to enlarge
- Click to enlarge
The next set of chord charts comes from an unknown source, but note that each page has the Fator’s name on it–Fator is a name affiliated with Dickerson steel guitars, as the owner of the company was Gaston Fator.
- E7 tuning
- C# Minor, p1
- C# Minor p2
- B11 p1
- B11 p2
Note that the C# Minor tuning actually resembles E13–essentially, the E7 tuning with the second string raised to C#. The C# Minor tuning (Sol Hoopii) is spelled: E C# G# E B E
I hope you find these charts useful.
Some “Dos and Don’ts” of Lap Steel Guitar
Here are a few tips for those who are learning to play the steel guitar. Some of them may seem obvious; some of them not so much.
1. Don’t be discouraged by the difficulty of getting your chord grips together (meaning your picking hand).
Do practice your grips, even in a non-musical fashion. For instance, practice grabbing a chord shape and then moving it from one string set to another, like this:

Things like this take time to master, but the more you practice, the easier it will become. Spend 5 to 10 minutes/day just on grips, not worrying that it doesn’t sound musical.
2. Don’t slide into everything (glissando).
Do use glissando sparingly, selecting the right time for maximum effect. Do practice moving the bar vertically along the neck using a staccato approach in order to gain more control of your sound. To do this, you will need to incorporate pick blocking. Also, the bar doesn’t leave the strings with this approach–it is completely reliant on your right hand.
3. Don’t get stuck in root, or straight bar positions (i.e., for playing in C major, sticking to the 12th fret).
Do find other positions or zones or pockets to play in. For example, you can get a C major sound (minus the root) by playing in G position (7th fret, C6 tuning). This serves as CMaj9. For playing singles notes, we can easily find our way through the C major scale in 7th position:

Do learn how to play a scale in every position, meaning beginning with any scale tone anywhere on the neck. Here’s another very useful example:

Do practice this in every key (including natural, harmonic and melodic minor) beginning on any note of the scale. Yes, I know it is a lot of work, but in order to gain freedom on the instrument, particularly from clichés, this is the kind of work that needs to be done. Spend 1/2 hour/day on this for several months until you are confident you can break it out easily and without hesitation.
4. Don’t forget that there are many ways to achieve something that doesn’t look feasible at first glance.
Do remember to investigate all options by thinking about slants (no matter how extreme they may seem) and behind the string bar string pulls. Here is an example of a I – IV – V progression with voice leading (note the tuning is C6/A7):

Notice how you can play 2 different inversions of the I-IV-V progression and keep the chords in a relatively small fretboard range.
5. Don’t let vibrato be an afterthought.
Do learn to be conscious of your use (or non-use) of vibrato, making conscious decisions on how you want it to enhance your phrase ahead of time. Don’t wait until the last moment to throw a quick shake on a note–it tends to sound feeble and nervous. Be confident and strong in your playing! Commit….
6. Don’t underestimate the value of major and minor triads. They have many more uses than just the obvious.
Do learn as many inversions of your major and minor triads as you can possibly find, everywhere on the neck. The major and minor triads can serve as altered dominant chords as well as extended harmonies of major and minor chords. Sometimes we overlook the simplicity of a simple triad while searching for something bigger, such as G13b9; if you are knowledgeable in harmony and music theory, it should be easy for you to spell this chord out:
G B D F Ab E (we skip the 11th degree, C). Looking at these 6 notes, what triads do we find? Obviously G, but what else? There is a B diminished triad, as well as D diminished. But we also have an E major triad. The E maj triad provides the M3, b9 and 13 of our chord. Perfect choice for G13b9. Need something for an A7 chord functioning as a V7 or VI7 in a turnaround? Try a Bbmin triad (Bb Db F) instead. Those notes spell b9, M3 and #5, a nice altered dominant sound. See what I’m getting at?…which leads me to….
7. Don’t shy away from learning basic music theory and harmony: they are your friends.
Do get acquainted with them because they open up doors and make it much easier for you to make music that’s outside of the box. It is always good to have choices.
8. Don’t use your wrist to make slants!
Do try to get used to guiding the bar with your fingers. Do make sure you are using the right bar. There have been endless discussions about whether a Stevens bar or Bullet bar or any other number of bars is right–I won’t go there. I will say that whatever bar you choose, make sure it is the right length and make sure you learn to manipulate it with your fingers, not your wrist.
9. Don’t let your playing sound monotone.
Do open it up and use your picking hand and bar to convey expression. Sometimes a nice strum of a chord with your thumb, or a wide bar shiver (ala Curly Chalker) can keep your playing from sounding monotonous and lifeless. Jerry Byrd was called the Master of Touch and Tone for good reason: he was always conscious of his expression and you could really get a feeling from his playing the way that you could from a singer or violinist. Harmonics are another great way to make it work.
10. Don’t get hung up by bad picking habits.
Do focus on making your digits work as a unit. There is quite a bit of work involved in getting a strong right picking hand. There are definitely picking patterns which you can work with on a daily basis to get your right hand under control. Joe Wright has a video called “Secrets Of The Wright Hand” which may help you to improve your picking technique. The video has no musical content, but Joe works you through a number of picking moves.
11. Don’t pick too hard. “What is too hard?”, you ask. Well, it’s when your strings are flapping out of control, sharp in pitch, and your fingerpicks are getting tangled up in the strings. Relax!
Do play in a relaxed, controlled manner. There is a lot to be said for a picker who has great chops, whether or not he/she decides to put them on display. The one thing every great picker has is poise and control. Comes with practice, nothing more. For those of us coming from a resonator background, this can be quite a revelation. The picking styles are quite different for both instruments (and so is the bar technique for that matter). Many people believe that the players who can really play both resonator and electric steel extremely well are rare birds. They’re probably right!
Hope this gives you something to think about. Time to run!


